
By Alice
16th July 2019
Its all very well and good buying art (OK its completely fabulous), but what happens next? Framing, hanging and transportation can be a total mystery to the new art buyer, and in many ways is almost as important as the artwork itself. Well, since opening our doors thirteen years ago we’ve gathered some top tips and just a *bit* of experience along the way, so we’ve put our heads together to share our ideas to create a guide worthy of any potential collector, no matter how big or small.
Delivery
- So you’ve bought a piece of art, firstly – congratulations! Unlike clothing, an iPhone or most other things, you’ve invested in something that you love purely for the way it makes you feel, and over the years won’t deteriorate, break or go out of fashion (should you treat it right). Post it on the gram, have a drink, run around the garden!
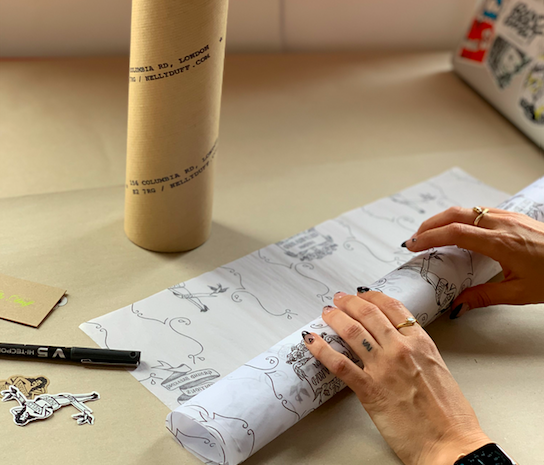
- We deal mainly with prints here at Nelly Duff, so chances are your artwork is going to get to you in a tube. We have our tubes custom built here in the UK to be able to withstand international shipment, and every member of the Nelly Duff team goes through training to be able to safely handle, roll and package your artwork, so you’re in safe hands. Our international deliveries are insured up to £400, but if you are buying something very special and want to rest even easier at night, we do offer a specialist art handler service. These are the crème-de-la-crème of shippers, and custom pack, insure and transport your artwork from start to finish in a timely and professional manner, we love em’, but they are pricier than standard shipping companies. To get a custom quote for the delivery of your artwork, just drop us a line and we can sort that out for you. If you’ve bought something like a canvas, an original artwork, a framed print or a highly delicate edition that can’t be rolled – this is the option for you.
- Your artwork has arrived safe and sound, you’ve given it the once over to make sure its in good condition and you are totally delighted – so what now? Now, protection and framing is the name of the game. Artworks, especially prints, are incredibly delicate, and things like exposure to dust, light and moisture can have negative effects on your edition. So, very carefully pop your artwork back in its tube, or if you aren’t confident you can roll it up safely again before you take it to be framed, leave it in the tube and ask the framer to remove it and check the condition with you. If you do this, make sure you take it to your framer asap so if there is any damage it can be dealt with as soon as possible.
Framing
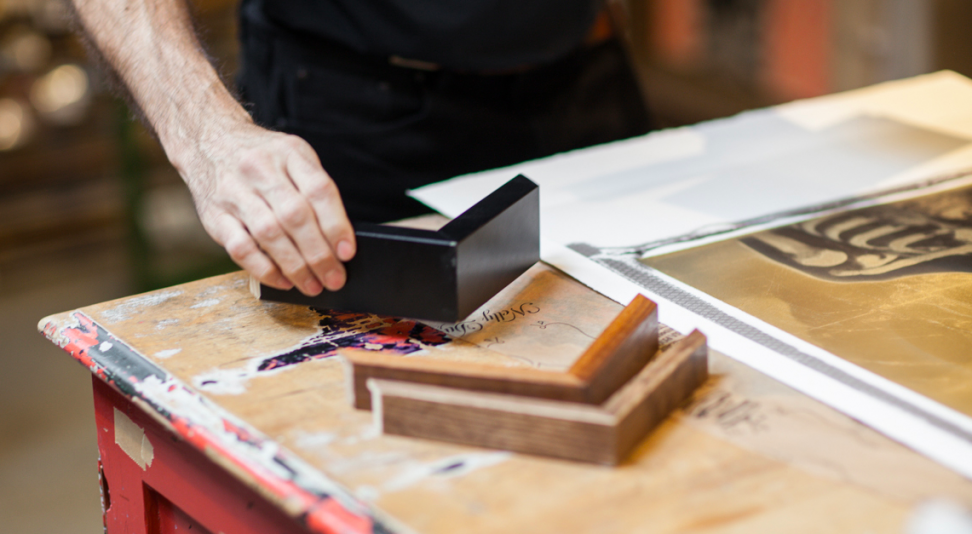
- Framing does three things: 1. Makes your artwork look even better than it already does. 2. Enables you to hang it safely and 3. Protects the artwork from the outside world to make it last as long as possible. Remember, its just paper so its not indestructible or designed to last forever, but with the right treatment it can. We have our own framing workshop, and make bespoke frames for every artwork, so you can always get framing done with us here at the gallery. But, if that’s not an option, look around your local area for a good framer. Of course you can buy custom frames online these days and even buy pre-made frames from Ikea (no judgement) but all this means is that you have to be confident in handling your artwork and accepting that this might not be the safest way to keep it. A good framer will handle your artwork with care, be able to make sure it is mounted flat after its been rolled, and allow it to shine in all its arty glory, as well as suggesting the best way to frame it to show it off. We are also always happy to provide recommendations, so if you’re in a pickle about what to do with your work and aren’t in the area, just drop us a line and we’ll recommend what we think works best.
- Framing is super personal, and also varies so much from artwork to artwork, but as a general rule we have a few tips that have always served us well.
- Don’t try and match your frame exactly to the colour of your walls, furniture, or curtains. It might seem like a good idea at the time but what’s important is that it brings out the best features of the work itself. This is a good rule generally, don’t panic about coordination or matching too much – we love variety, and a mixture of textures and colours can look incredible together.
- Is the border of your print torn? The edges of prints tend either to be cut in a straight edge, or torn down (the pro term is ‘deckled’) to create soft textured edges. If it is, we would recommend floating your artwork forward in the frame with a bit of space around the artwork to really show them off. Don’t hide them behind a window mount or tuck them up against the edges if the frame, its all part of the work and floating your artwork gives it a sense of occasion and space to breathe.
- Get creative, adding unexpected touches like coloured fillets, or a coloured mount can uplift and provide flare to any edition and make your frame personal to you. We offer coloured fillets at Nelly Duff, and don’t add any cost to the frame, so are a great option to add creativity cost-effectively.
- Break the mould. Just because a print is contemporary doesn’t mean it won’t look great in a baroque frame, or because its more traditional won’t shine in a custom Perspex box. Try and step outside your comfort zone to personalise your artwork and turn it into a three-dimensional focal point. Any good framer will be happy to discuss options and apply their professional opinion, we offer a free no-appointment-necessary consultation service, so you can stop by any time to discuss framing, even if it is about non-nelly artworks!
- Now to cover the glass situation. A lot of framers will use acrylic as standard and give you the option to upgrade to glass, but what’s the difference? Obviously glass is heavier than acrylic, but it offers a level of UV natural protection (30%), is far less prone to scratches and will not warp due to heat or light exposure. At Nelly Duff we use glass as standard in all framing and is included in the price (NBD) but you also have some options when it comes to which glass is right for your artwork. Depending on what type of artwork you are framing, its value and where It will be hung you can choose a glass that will protect your edition perfectly! So, you’ve got anti-reflective glass – a great option if your artwork is dark or contains large areas of black, UV proof (100%) which will protect your work from fading in the sun and Museum glass – a combination of the two.
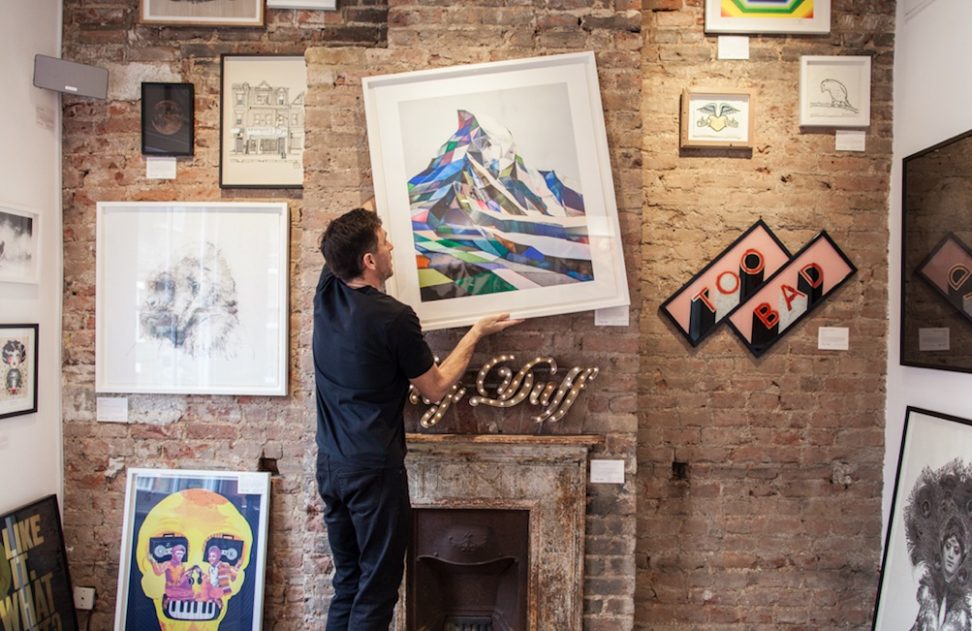
- Once you’ve chosen your frame – now its time for the hardest bit – the waiting. It varies from place to place how long it will take, but at Nelly Duff framing usually takes around 2-3 weeks. Custom built frames can take their sweet time, but its worth it in the end we promise. If your artwork is particularly large or requires special attention (the best kind) be prepared to wait a little longer! No need to anxiously twiddle your thumbs or fill the time with a 900-piece jigsaw, now is the time to plan (wait for it) the HANG!
The Hang
- So, the frames are ready and waiting to be collected. You can courier frames, and at Nelly Duff we offer a courier service within London, and other options for further out, but bare in mind that frames are fragile souls, and don’t love being transported long distances. White frames in particular are very susceptible to damage, so if you want to make sure that your gorgeous frame is 100% perfect, we recommend collecting in person. This means not only that you can check the condition of your frame before it leaves the gallery, but that you know the only person handling it between the framer and your front door will be you. Now, time for a serious rule – are you listening? Good. Do not unwrap your frame until it is literally on the wall. That’s it. Trust us when we say we know how tempting it is to unwrap your frame and lean it against the wall so you can admire it before you have the chance to hang it up, but this is what we call ‘THE DANGER ZONE’. We can’t tell you how many lovely frames have been chipped by a swinging tote bag, toppled by a roaming toddler or even smashed by a passing pet while waiting to be hung. Its not worth it, and it makes us sad to think about. When you get it home, immediately open it up to check it didn’t sustain any damage en route, but then wrap it back up! We recommend taking a picture so when the craving to look strikes, you can take comfort in a snap.
- Now onto the placement. There are a million rules and regulations you could apply here, but ultimately it’s a matter of test and instinct. There is no such thing as a set curation guide, but there are a few handy ideas that might make it a little easier.
- Try to hang your artwork at approx. 1.5m (in the centre of the piece) – this means that its about eye level and is the most comfortable level to view the work at. If you go to galleries, they tend to abide by this rule. In museums you will see a lot of old works hanging a lot higher, this tends to be so you can enjoy the work without having the glare of the light on the varnish obscuring the piece.
- Don’t feel the need to stick to one colour or theme for one area, home curation isn’t about sticking rigidly to one theme, like all blue artworks in the bathroom, but choosing the right piece for how you use that room. If you want something for above your desk, choose something that brings you inspiration and focus. If you have a wood-burner in your living room, choose something that will benefit from the warm glow of the fire.
- Artwork in the home provides function as well as feature, if you have a neglected corner, a bright and colourful artwork can open it up just as well as any mirror! If you have an artwork that’s bold and dramatic, calm it with a white frame, and hang other pieces around it, if you want to heighten the drama and draw focus, choose a dark frame and leave its surroundings clear for it to shine.
- Adding small to medium pieces in subtle areas, like an alcove, above a side table or next to a door instantly makes a room feel more rounded. Its easy to focus on the large spaces that need filling, but it’s the smaller areas which add nuance and warmth to a room when they have artworks on them.
- Lastly a bit of advice that was given to us, never hang your most prized piece in the most obvious place, i.e. above the fireplace. A valuable work neatly placed in between two windows, or on the side wall is far more intriguing, and is sure to keep them guessing. Oh so cool.
The Gallery Wall
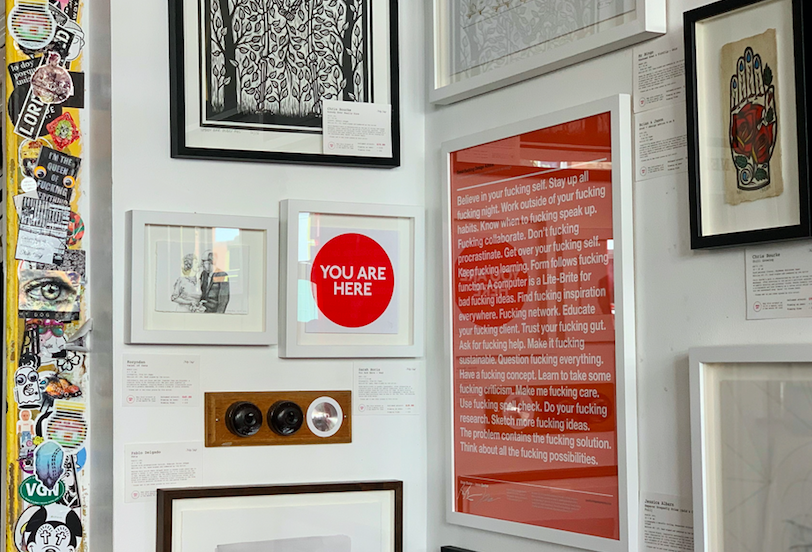
- It may be stating the obvious when we say we love (LOVE) a salon hang. Stemming back to the days of the traditional French ‘Salons’ or exhibitions, a salon hang is the most decadent and enticing of all – think the Royal Academy Summer Exhibition with paintings filling every corner of the room, right up to the ceilings. Or pretty much any wall at Nelly Duff. Although they may seem daunting, its merely a case of planning, so here’s a few choice tips:
- Get your measurements. List up the measurements of the works you want in your gallery wall, and start sketching. It doesn’t have to be precisely to scale, but by playing around and getting familiar with the sizes of the works you will be able to figure it out much faster.
- Clashing is the key. If you start worrying about what colour or pattern might jolt with another, you’ll be planning forever. Go with your gut, and don’t be afraid to make bold choices. It is the confidence and devil-may-care attitude of the gallery wall that makes it work.
- Mix it up. Combine artworks of various sizes as much as possible, big next to small, small next to XL, XL next to medium etc. There is nothing more satisfying than seeing a tiny A6 work filling the perfect space between three larger works.
- Start from the centre. If planning really isn’t your game, or you are feeling a bit more flexible, start by hanging a piece in the centre of the wall and work your way out. Test, move and rehang to your heart’s content. Remember, all frames will have string on the back that can easily be adjusted to make a work sit higher or lower, so changes can always be made if necessary.
- Keep an element of uniformity. Chaos only works if there is order to balance it, in this case the order is the spacing between the artworks. If you keep the gap between the artworks uniform, 5-6cm or so depending on your preference, it will look thought through and professional.
The Technical Bit
- This tends to be the part that most people have the least experience with, and get most worried about. Fear not! Hanging artwork is not as daunting as you might think, and is easy to get the hang of.
- Every (Nelly Duff) frame will come with D-rings and string on the back, so you have two choices. You can be very precise, and place the hooks exactly where the rings are – only recommended to those who are good at maths. Or you can use 1-2 hooks and hang the artwork on the string. This is the more flexible method, as the artwork’s height can be adjusted easily with the string, and if it is slightly off centre can be easily moved back into place.
- Unless your artwork is particularly large, you can hang it with nails and picture hooks, to find the right nails for your wall ask your local hardware store for their suggestion, but plaster board walls won’t need tough masonry nails to be hammered in. Always use hooks as opposed to hanging directly from a nail, its far safer and will hang your work flatter to the wall. If your work is large, then a screw and a drill might be necessary. Always use a plastic wall plug along with the screw to make sure it stays nice and secure – not sure how to properly use one? The magic of YouTube tutorials has guided Nelly out of many a DIY dilemma, and thankfully there are hundreds of videos on screws, nails and everything in between. Thank you internet!
And before you ask, no, command strips don’t work, yes your artwork will fall and the frame will smash and you will be sad. That is our final word on the matter.
- Finally, remove the blue foam corners and plastic wrapping once the artwork is on your wall, or if that’s not an option immediately before placing it on the hook. This means that it won’t get knocked or chipped by any rogue drills, hammers or arms in the process. Got all that?
- Now its time to enjoy your (beautifully hung) artwork! As long as you treat it with care and give it a bit of distance, your frame should keep your artwork in great condition, and looking brilliant for a very long time. If you are unsure what do to now, please refer back to step 1 for suggestions.
Got any more questions? Don’t hesitate to ask us, drop us a line to hello@nellyduff.com or give us a call on 020 7033 9683. We’re open seven days a week, and one of our lovely team members will always be happy to talk about your artwork, its kind of our thing.